If you are using SSH client to connect to Linux server from your Windows laptop, sometimes it may be necessary to launch UI application on the remote Linux server, but to display the UI on the windows laptop. Following are two typical reasons to perform this activity:
Install software on Linux from Windows: To launch a UI based installer to install software on remote Linux server from windows laptop. For e.g. A DBA might want to install the Oracle on the Linux server where only the SSH connection to the remote server is available and not the console.Launch Linux X client software on Windows:To launch X Client software (for e.g. xclock) located on your remote Linux server to the Windows laptop.
Cygwin can be used to perform the above activities. Following 15 steps explains how to install Cygwin and launch software installers on Linux from Windows. Go to Cygwin and download the setup.exe. Launch the setup.exe on the Windows and follow the steps mentioned below.
1. Welcome Screen. Click next on the Cygwin installation welcome screen.

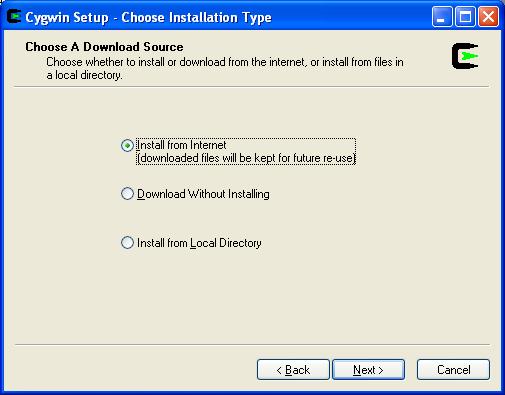
2. Choose a download source. Select the 'Install from internet' option
3. Choose Installation directory. I selected C:\cygwin as shown below. This is the location where the Cygwin software will be installed on the Windows.

4. Select Local Package Install directory. This is the directory where the installation files will be downloaded and stored.

5. Select Connection Type. If you are connected to internet via proxy, enter the information. If not, select 'Direct Connection'.

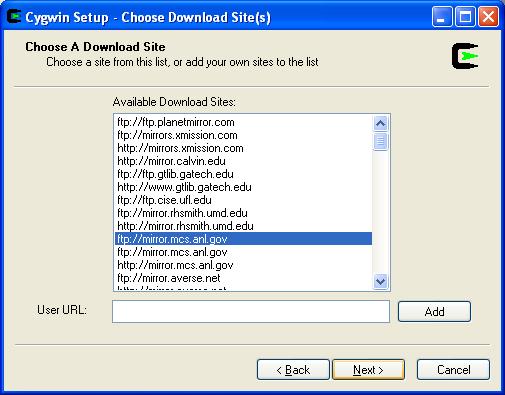
6. Choose a download site. You can either choose a download site that is closer to you or leave the default selection.
7. Download Progress. This screen will display the progress of the download.

8. Select Packages to install. I recommend that you leave the default selection here.

9. Installation Progress. This screen will display the progress of the installation.

10. Installation Completion.

11. Start the Cygwin Bash Shell on Windows.Click on cygwin icon on the desktop (or) Click on Start -> All Programs -> Cygwin -> Cygwin Bash shell, which will display the Cygwin Bash Shell window.
12. Start the X Server on Windows. From the Cygwin Bash Shell, type startx to start the X Server as shown below. Once the X Server is started, leave this window open and do not close it.

13. Xterm window: startx from the above step will open a new xterm window automatically as shown below.

14. SSH to the remote Linux host from the Xterm window as shown below. Please note that you should pass the -Y parameter to ssh.-Y parameter enables trusted X11 forwarding.
jsmith@windows-laptop ~ $ ssh -Y -l jsmith remote-host <This is from the xterm on windows laptop> jsmith@remotehost's password: Warning: No xauth data; using fake authentication data for X11 forwarding. Last login: Thu Jun 12 22:36:04 2008 from 192.168.1.102 /usr/bin/xauth: creating new authority file /home/jsmith/.Xauthority [remote-host]$ xclock & <Note that you are starting xclock on remote linux server> [1] 12593 [remote-host]$
15. xclock on windows laptop. From the Linux host, launch the xclock software as shown above, which will display the xclock on the windows laptop as shown below.

Use the same method explained above to launch any software installer on Linux (for e.g. Oracle database installer) and get it displayed on the Windows laptop.


