JavaScript has been a popular language for Web development, but it was restricted to the browser. Node.js takes a step beyond and uses JavaScript for shell scripting, server side scripting and more. This article gets you started with the Node development environment.
Node.js allows developers to build applications using their favourite JavaScript language. Though there is extensive add-on software built on Node for Web development, it is not restricted. You can also develop command line utilities, standalone applications and server-based software using Node.
Node consists of two main components – the JavaScript engine and the Web server. The JavaScript engine is a high performance, finely tuned Google V8 engine. A Web server embedded in Node makes it attractive for developing applications for HTTP clients such as browsers.
Node takes JavaScript to a new dimension by adding the file system access functionality. Such functionality was not available in JavaScript, as it was restricted to running in the browser sandbox.
Installing Node
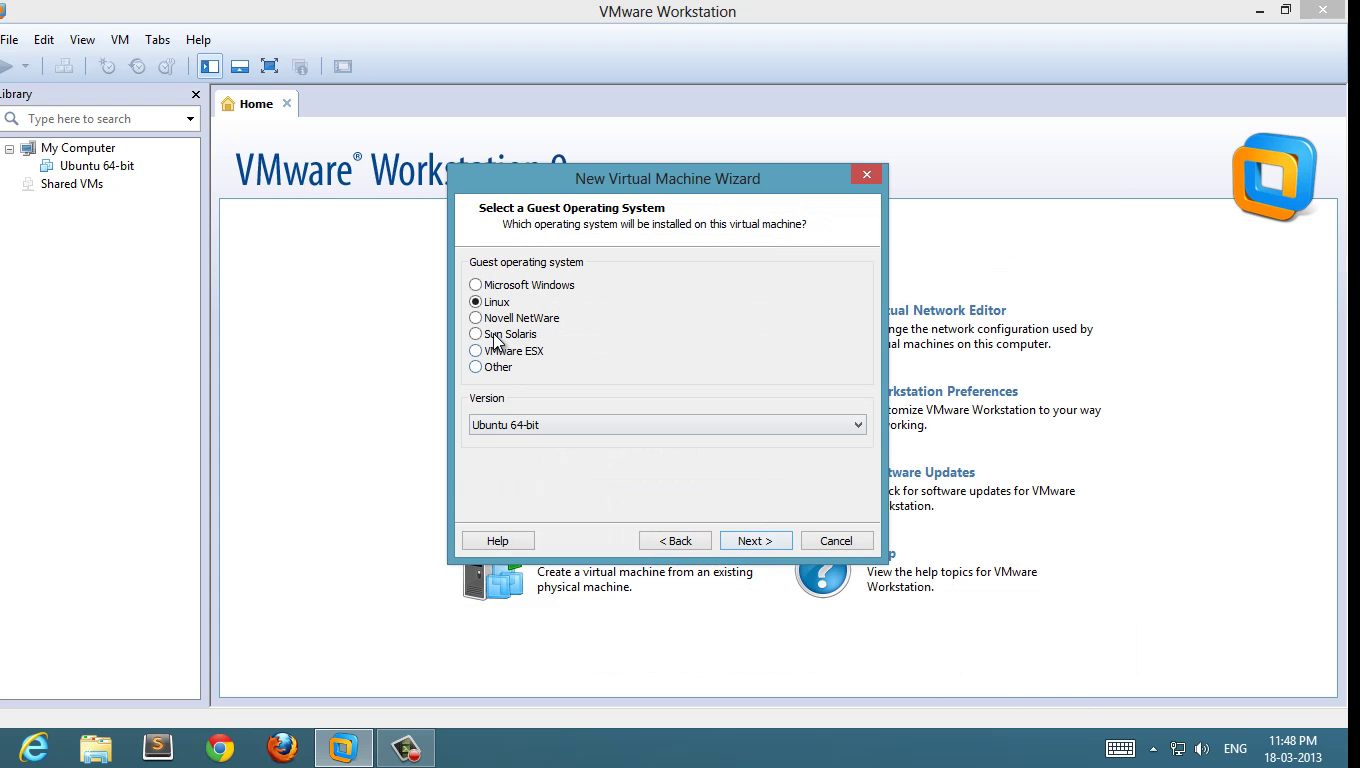
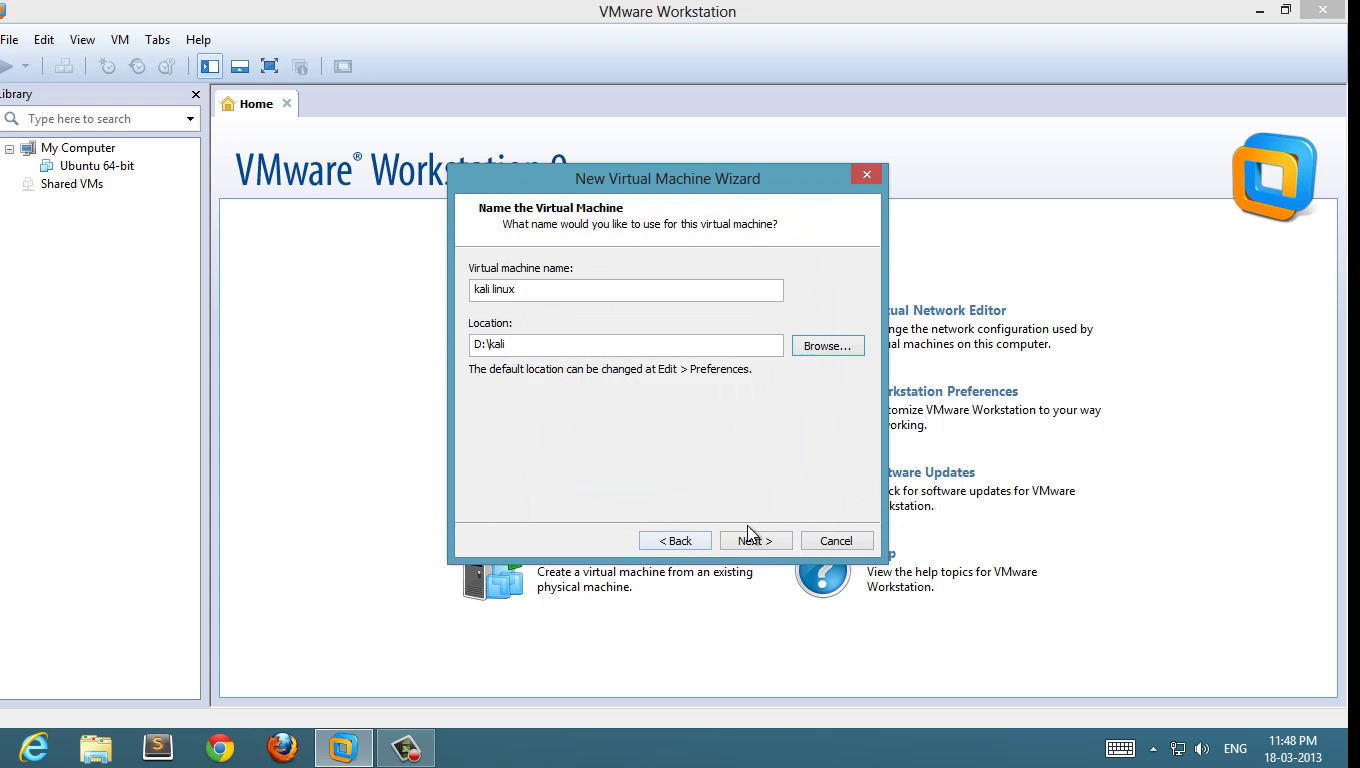
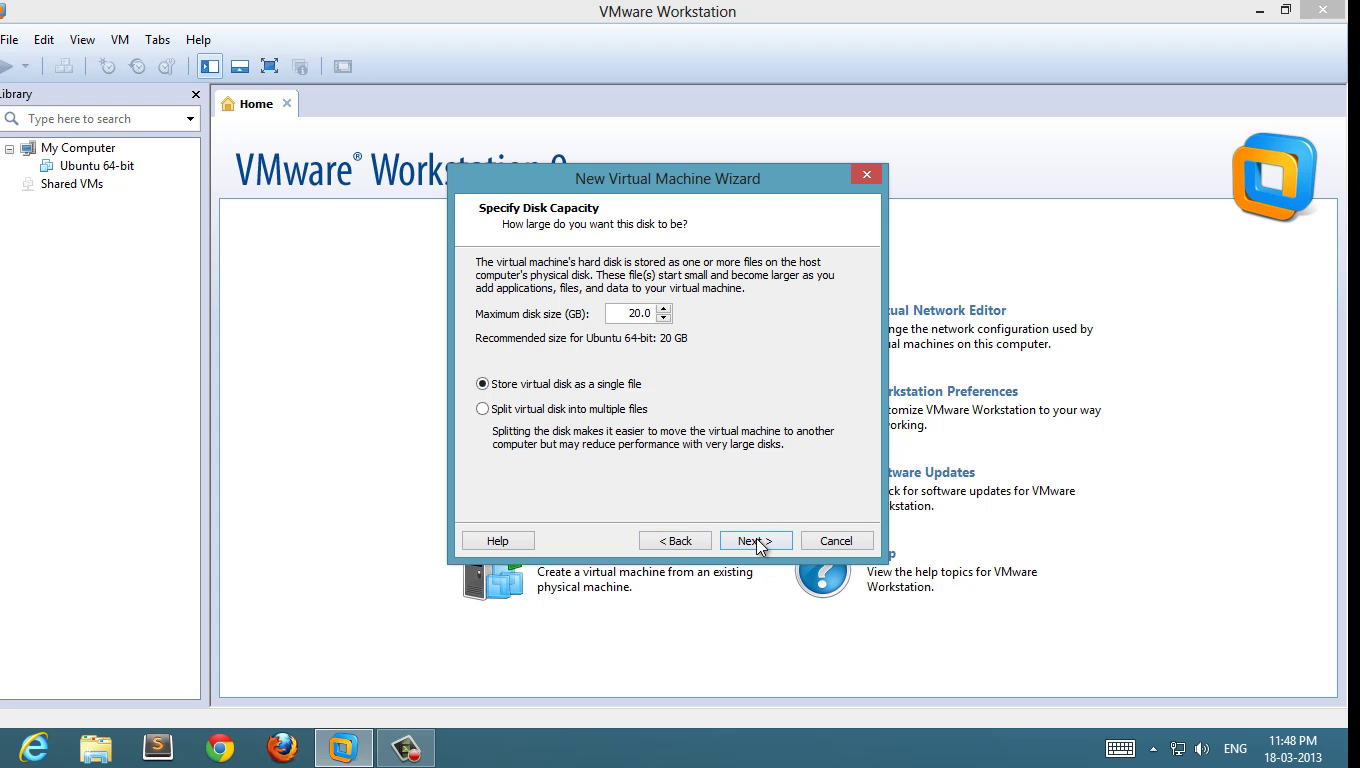
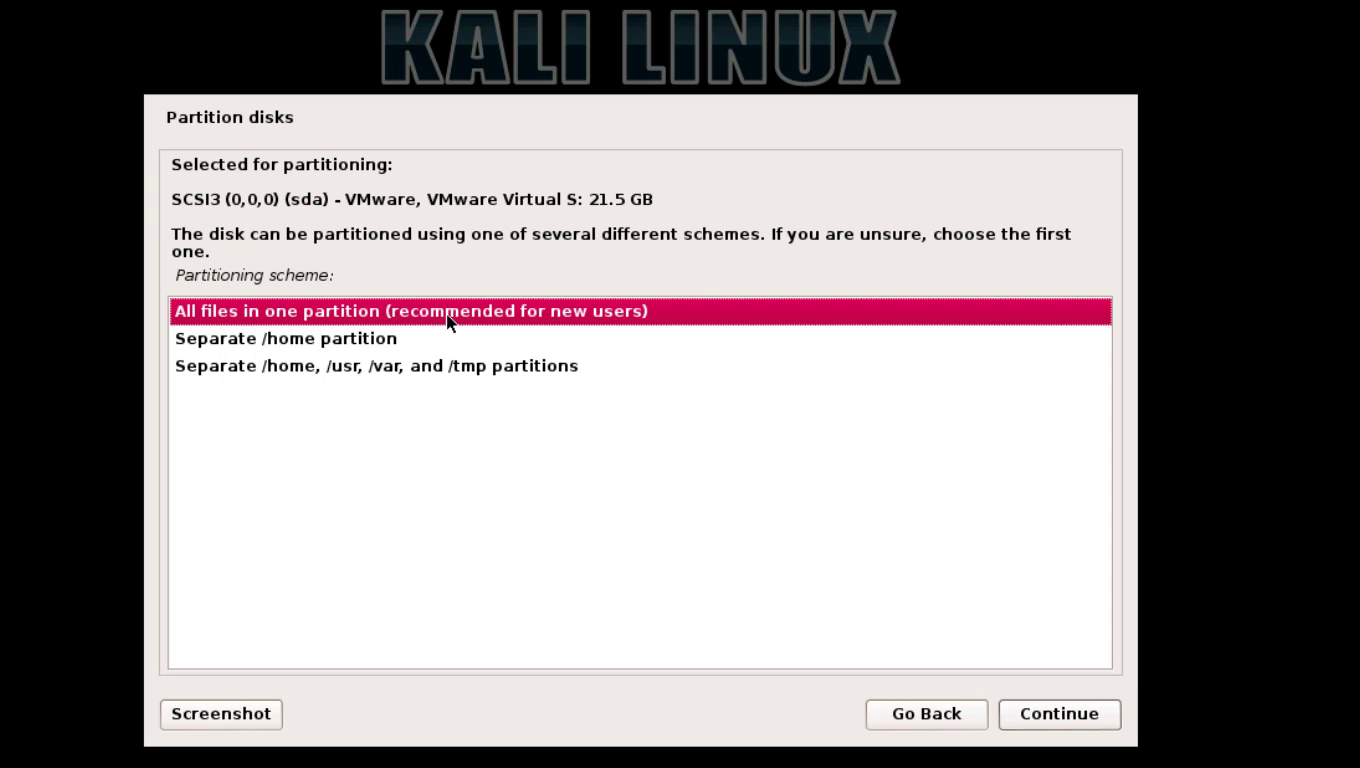
Node.js is available as pre-compiled binaries on all popular platforms such as Windows, Mac, and Linux. Installation on the respective platforms is simple with a wizard style installer.
On Mac and Linux operating systems,Node.js gets installed in the /usr/local/bin directory.
To check the installation, run the following command:
$ node --version
$ node
>
Command line Node
Node allows evaluation of JavaScript expressions and code at the prompt. This feature is very handy if you are learning the basics of JavaScript.
$ node
a = 10
10
> console.log("Value of a = "+a)
Value of a = 10
undefined
> (Ctrl+C twice or ".exit" to quit prompt)
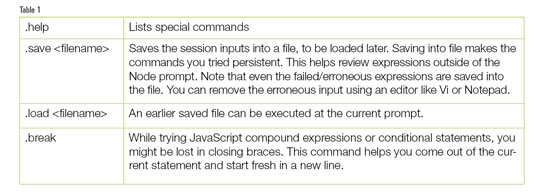
The command line parser is a REPL (Read Eval Print Loop). The few commands given in Table 1 help while trying Node REPL.
Node Package Manager
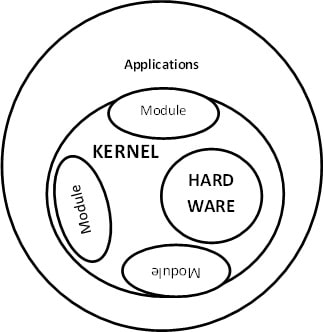
Node packages are modular libraries that help in specific functionalities. For example, file system management such as listing files in a directory and reading files is provided by the 'fs' package. This makes Node programming easy where you can pick and reuse the existing code snippet in your code, rather than coding from scratch. For example, to write a robust Web application that takes an input, processes it and gets back output to the browser, could take around 100 lines of code. But with existing packages, you could do it in a few lines.
Node Package Manager (npm) allows users to install, update and uninstall packages to the Node environment. The best part is that the installation and use of packages is very simple. If you can think of new functionality, it is very easy to create and add a new package. Currently, there are 40,000+ packages for Node in the repository!
To install a new package you can use:
$ npm install <package-name> //to install a package and //dependent packages
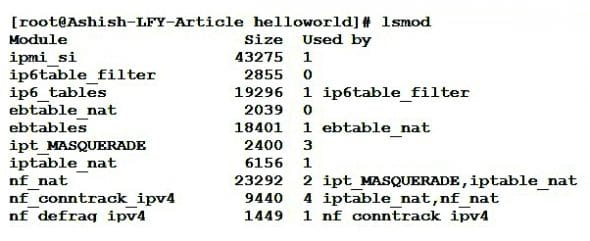
$ npm ls //to list all the installed //and dependent packages
Node Package Manager maintains the packages and dependencies learnt from a JSON file. When you install a package, the dependent packages are picked automatically for installation.
For a list of all packages that can be installed from the npm registry, visit:https://npmjs.org
Writing command line utilities using Node
Node can be used to write shell scripts using JavaScript. If you are a Web programmer with JavaScript experience, you need not learn any other shell scripting. Given below is the procedure to make a Javascript file execute like shell script from the command prompt.
The shell script below is written to watch for any changes in a file. Whenever the watched file content is changed or modified, the user gets a line printed with the size and time of modification.
1 #!/usr/bin/env node
2
3 var filename = ;
4 if (process.argv.length == 2)
5 { 6 console.log(Syntax: ./watch-file.js <filename>);
7 return 1;
8 }
9 else
10 {
11 filename = process.argv[2];
12 console.log(Filename being watched: + filename);
13 }
14
15 var fs = require(fs);
16
17 fs.watchFile(filename, function (curr, prev) {
18 console.log(filename + : (size: + curr.size+ ) + curr.mtime);
19 });
Here's an explanation of the script given above.
Line 1: Instruction to use the Node environment to execute the script.
Line 3 – 13: Accept the file to watch as command line argument. If the file name is not sent as a command line parameter, print the syntax. If the file name is entered, print <name of the file>is being watched for modifications.
Line 15: Use the Node file system library.
Line 17: watchFile is a file system method. The first parameter is the file name. The second parameter is the callback function, which gets called whenever the watched file is touched or edited.
Line 18: Print the file name, size and time modified.
To execute the script at the command prompt, change the file permissions and type the file name:
$ chmod +x watch-file.js
$ ./watch-file.js
Syntax: ./watch-file.js <filename>
$ ./watch-file.js watch.txt
Filename being watched: watch.txt
In another terminal (2), either 'touch watch.txt' or edit the watch.txt file. After completing the operation, a line gets displayed like the one below at the terminal (1).
watch.txt: (size:0) Tue Sep 17 2013 20:01:03 GMT+0630 (India Standard Time)
JavaScript is known for its string manipulation and extensive parsing capabilities. The special features of this language, like event driven programming, anonymous functions and closures, make shell programming a lot more fun.
A Web application with JavaScript on the server side
There were many popular scripting languages that were the de facto choice at different periods of time. Perl has excellent capabilities for text manipulation and is well suited for CGI scripting. Python and PHP were later preferred for their object oriented nature and embedded scripting into HTML files. So, for complete Web development, a programmer needed another scripting language exclusively for the server side.
Now with Node, that necessity is removed and the Web developer can just do complete application development using JavaScript.
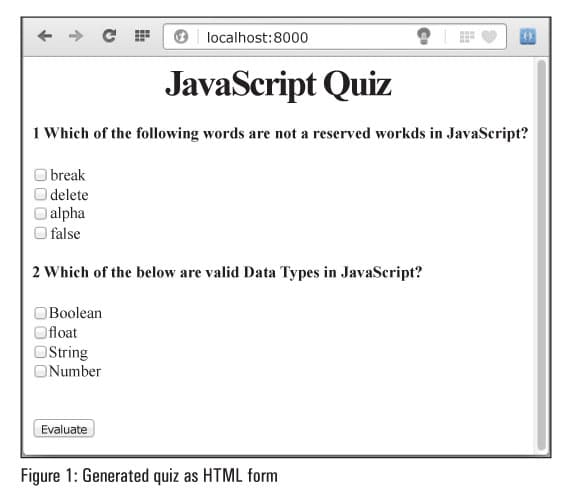
Let's now develop a Web application that generates a quiz questionnaire, reading from a text file as input. The input is a text file where the quiz master can type the quiz questions and multiple choice answers.
Given below is a sample of the input file with the title in the first line and with two records:
1 JavaScript quiz
2 Which of the following words are not reserved words in JavaScript?::break:delete:alpha:false
3 Which of the following are valid data types in JavaScript?::Boolean:float:String:Number
Here the questions and answers are separated by '::' and multiple choice answers are separated by ':'.
Given below is the complete code for the JavaScript quiz.:
1 var http = require('http');
2 var fs = require('fs');
3 var question = ;
4 var options_array = ;
5 var quiz_heading = ;
6 var data_lines = {};
7
8 fs.readFile(./questions.txt,'utf8',
function (err, data) {
9 if (err) { return console.log(err); }
10 else
11 {
12 data_lines = data.split('\n');
13 }
14 });
15
16
17 var server = http.createServer(function(req, res) {
18 res.writeHead(200, {Content-Type: text/html});
19 res.write(<html><head><title>+ quiz_heading
+ </title></head>);
20 res.write(<body>);
21
22 //Extract QUIZ heading, which is the first line
23 quiz_heading = data_lines[0];
24 res.write(<h1 align=center>+quiz_heading+</h1>);
25
26 res.write(<form>);
27 for (var i=1; i < data_lines.length; i++)
28 {
29 if (data_lines[i].length > 1)
30 {
31 var q_and_a = data_lines[i].split(::);
32 question = q_and_a[0];
33 options_array = q_and_a[1].split(:);
34
35 res.write(<h4>+ i + + question+</h4>);
36 for (j = 0; j < options_array.length; j++)
37 {
38 res.write(<input type=checkbox>
+ options_array[j]+</br>);
39 }
40 }
41 }
42 res.write(</br></br><input type=submit
value=Evaluate>);
43 res.write(</form></body></html>);
44 res.end();
45 });
46 server.listen(8000);
47 console.log(Connect to http://localhost:8000);
Here's the explanation of the above script.
Line 1: Include the file system and http libraries, which will be used later.
Line 3-6: Variables declaration. data_lines is an array to store records from file.
Line 8-14: Read the file and separate each line as a record. Split function makes an array with each line as one element in an array. Line 1 of the input file is the array element with index 0.
Line 17-20: Create a server instance. Write the HTTP header to the browser when a new request comes.
Line 22-24: Write the head of the HTML file based on the first line of the input file.
Line 26-45: Parse Line 2 to the end of the file and split the questions and answers. Prepare the HTML form elements using a checkbox for each answer option.
Line 46: Listen to port 8000. If browser and server are on the same machine, open http://localhost:8000/ in your Web browser.
Line 47: Details of the URL where the server can be reached.
Now run the program using the command below:
$ node node-quiz.js
Connect to http://localhost:8000
The output can be seen in Figure 1.
Enhancing the Web application
The above application only displays a quiz questionnaire. But the same can be enhanced for processing the number of right answers and evaluating the scores. To develop a full production grade Web application,Node.js popular package Express can be used.


